A hole in the wall used to be a good thing, the kind of tucked-away taco spot you bragged about finding. Yours is the other kind, the drywall hole nobody brags about, which is why you are here, and the good news is it is more forgiving than it looks. The size of the drywall hole is what decides everything else. A nail hole or a doorstop ding is a smear of spackle and about twenty minutes of your life. A doorknob-sized hole needs something solid behind it before you fill it, or the patch has nothing to hold onto. Once a hole gets bigger than your hand, you stop filling and start cutting, because at that point you are better off dropping in a fresh piece of drywall than fighting to bridge the gap with mud.
Figure out which one you have and the rest is mostly patience. Below is how each size actually goes, the step nearly everyone gets wrong, and the honest truth about when a hole is even worth paying for. Quick confession before we start: I have done this for years and still call the gypsum board sheetrock. My apprentice tells me that is not the technical term. I told him it became the technical term as of this morning.
Start by sizing it up
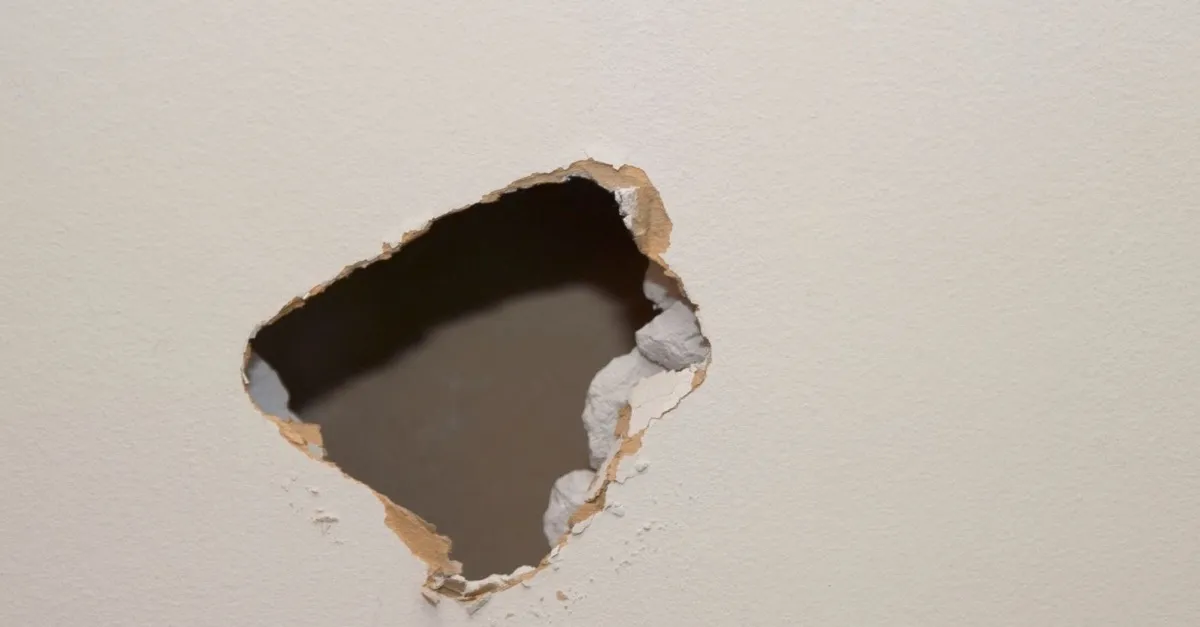
Drywall holes come in three flavors, and the size tells you the method before you touch a tool. Small is anything up to about half an inch: nail holes, screw holes, the little crater a doorknob leaves the day the doorstop decides to call in sick. Those just want spackle. Medium runs from there to about six inches, which covers most doorknob blowouts and the spot where somebody set a chair leg down with a little too much confidence. Those need backing. Large is anything past six inches, and those get cut out and replaced rather than filled.
The classic mistake is treating a medium hole like a small one and troweling spackle straight across the opening. Spackle needs something to grab. Spread it over thin air and it sags, then cracks, then drops onto your floor a week later like it never planned to stay. So the real first question is what is behind the hole, not what is going over it.
Small holes: nail holes and dings
For the little stuff, push a dab of lightweight spackle into the hole with a putty knife, scrape it flush with the wall, and walk away while it dries. When you come back, give it a quick sand, prime the spot so the paint does not soak in funny, and paint. A deep hole might want a second pass, because spackle shrinks a touch as it sets and a single coat can leave a faint dimple where you swore it was flat.
And here is the part most drywall guys will not say out loud: do not pay anybody to do this. A tube of spackle is about six bucks and will outlast a hundred nail holes. Calling someone out to fill a single thumbtack hole costs more in their gas than the repair is worth, and any honest contractor will tell you so before they hand you a putty knife. We would rather you remember us as the guy who talked you out of a service call than the guy who cashed one. Save the phone call for when you have a whole wall of them, or a hole with something genuinely wrong behind it.
Medium holes: the doorknob special
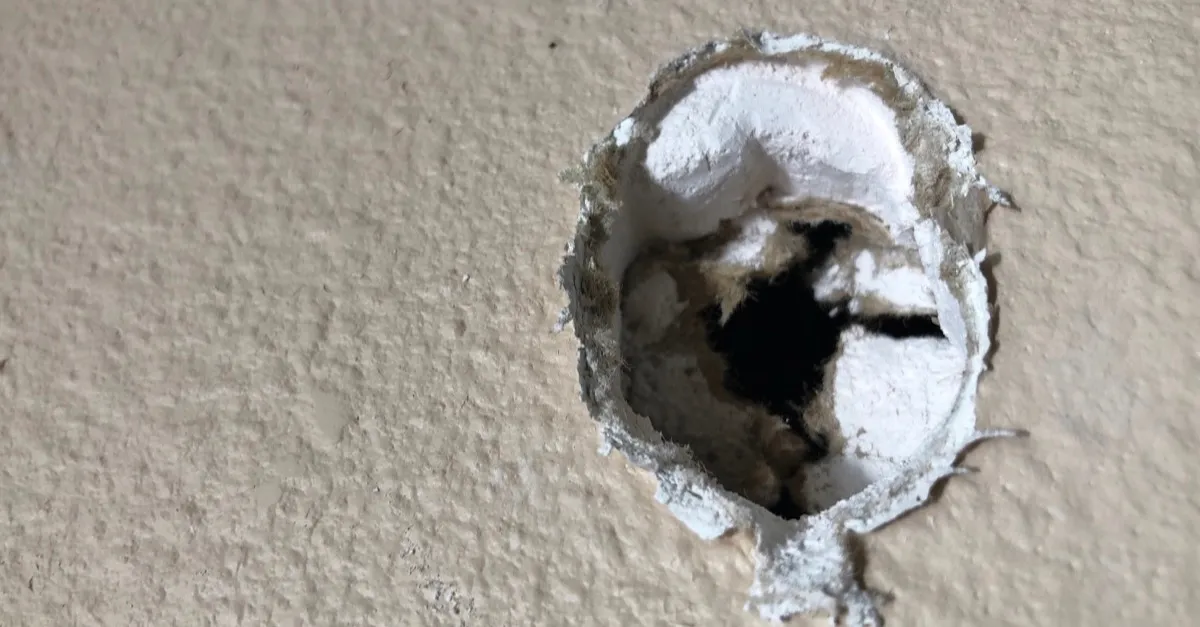
The doorknob hole is the great unsolved mystery of homeownership. Nobody did it, nobody saw it, and a six-hour interrogation of everyone in the house turns up not one usual suspect. What it leaves you is a hole too big to simply fill, which means it needs backing, a tradesman's word for something solid behind it for the new material to grab. For holes up to a few inches across, the easy route is a self-adhesive mesh patch, basically a stiff metal sticker you press over the hole and then coat with mud until the mesh disappears under the surface.
For the bigger doorknob-sized ones, a lot of pros reach for what is called a California patch. You cut a square of drywall a bit larger than the hole, peel the paper off the back so a little flap hangs past every edge, and bed that flap into the mud. It sounds fiddly and it absolutely is the first time you try it, but it sits flatter and holds better than mesh on anything approaching fist-sized.
Either way, build the mud up in thin coats and spread each one a little wider than the last. Trying to fill the whole thing in one heroic pass just gives you a mound you will be sanding well into next week, asking yourself why you did not do it in coats.
Big holes: cut it out and start fresh
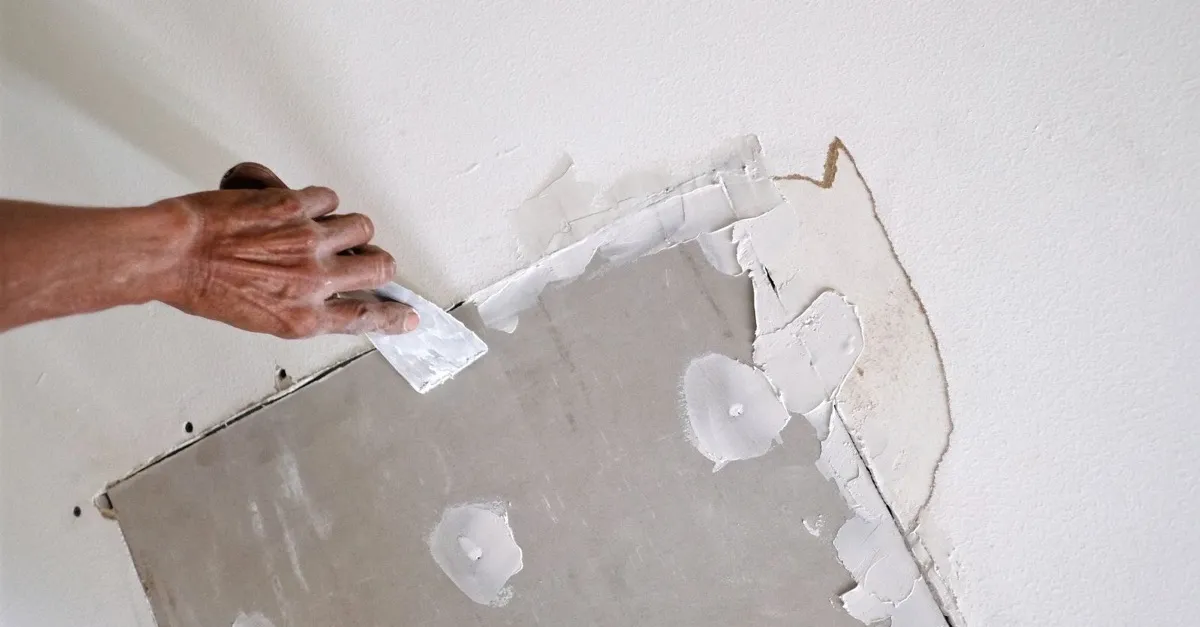
Past about six inches, quit patching. This is the point where Andy Dufresne needed nineteen years and a rock hammer; you have a drywall saw and an afternoon, so count your blessings. Square the damage off into a clean rectangle, because a tidy rectangle is far easier to fill than some ragged moon crater. If you cut in and find nothing but air behind the wall, slide a scrap of wood in there and screw it to the back of the existing drywall on both sides, so you have something to fasten the new piece to.
Then cut a fresh piece of drywall to fit the opening, screw it onto that backing, and tape the seams. From there it is the same rhythm as any drywall joint. Coat it, feather it, let it dry, sand it, do it again. Nothing clever about it, just honest repetition.
Mud, tape, and the art of feathering
Mud is where a patch lives or dies, and it almost never wants one fat coat. Plan on three thin ones. The first beds the tape, and the next two widen and flatten the repair until it melts into the wall around it. The word for it is feathering, which just means pressing a little harder at the edges so the mud thins out to nothing instead of stopping in a ridge you can find with your eyes closed. My wife will tell you patience is not my strong suit; my drywall politely disagrees, and it is the one argument in the house I am winning. The trade is picky enough about all this that there are official levels of finish, and a patch in a wall you actually look at gets held to the top one.
Let every coat dry before you add the next. Regular joint compound wants about a day in between. If you are impatient, setting-type compound is your friend. It comes as a powder in a bag with a number on it, like 20 or 45, which is roughly how many minutes you get before it turns to rock, and it sets chemically rather than by drying. That lets you finish the whole patch in an afternoon. It is the closest thing drywall has to a fast-forward button.
Matching the texture and the paint
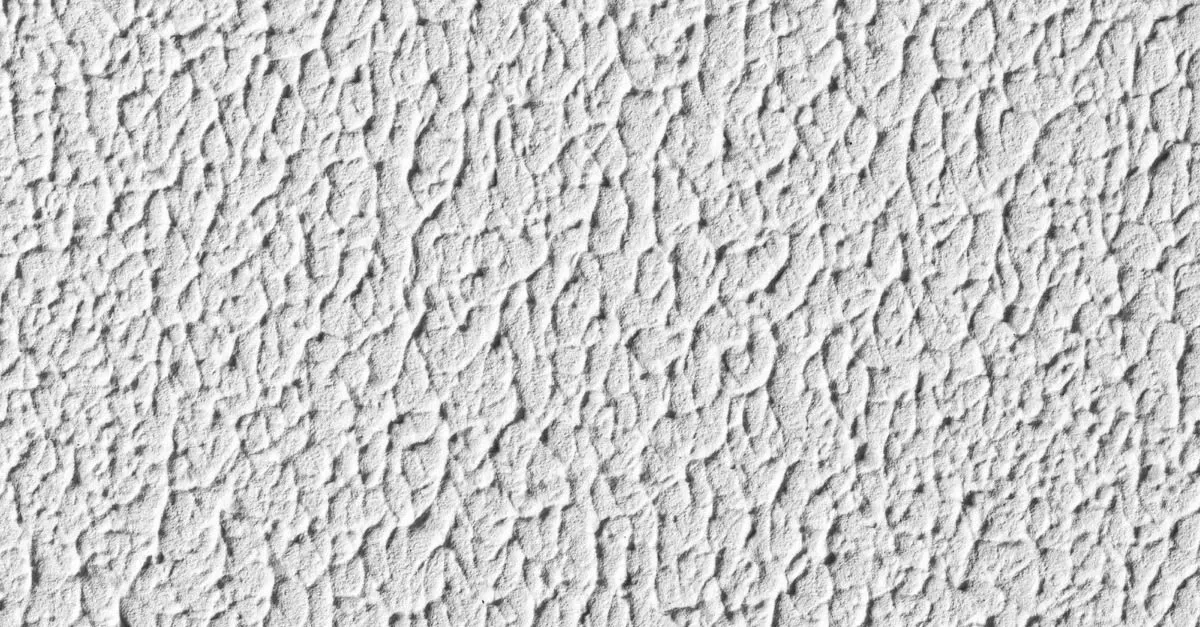
You can get a patch perfectly flat and rock solid and it will still jump out at you, because the wall around it is not flat. Most Houston walls and ceilings wear a texture, usually orange peel or knockdown, and a patch of smooth mud in the middle of that catches light differently than everything around it. Your eye finds it every time, like it has a grudge and a flashlight. So before any paint goes on, the patch gets re-textured to match its neighbors. Blending that texture until the repair disappears is honestly the real skill in this whole trade, and it is its own job, which is why we treat it as one under drywall finishing and texture work.
One last thing people love to skip: prime the patch first. Bare mud drinks paint at a different rate than the rest of the wall, so even a flawless color match will flash a dull halo around the repair if you roll straight over it. A single coat of primer makes the whole thing read as one wall again, instead of a wall with a story it clearly wants to tell.
When to just call somebody
Plenty of holes are a perfectly good Saturday project, and you should feel free to grab the spackle and go for it. Call a pro when the job turns out to be bigger than the hole. Ceilings are the obvious one, since gravity and an eight-foot sheet of drywall over your head turn a simple patch into a two-person wrestling match. The same goes for a big opening, anything near a leak where the board has gone soft, or a wall that is already wearing a patch somebody else got wrong.
That last one walks through the door a lot. Somebody stuffs a hole with a wad of paper towel, skims it with whatever was on the garage shelf, and paints over the top. It holds for about a week, which is honestly more than paper towel has any right to, and then the middle quietly sinks in and the patch starts glowing on the wall like a bullseye. If that is the wall you are staring at, or the texture has you beat, that is the kind of thing we handle every day around Greater Houston, and there are more drywall guides right here if you would rather keep reading first. Either way, we will fix the hole, match the texture, and almost certainly tell you a terrible joke on the way out. Consider that a bonus, not a warning.
Frequently asked questions
How much does it cost to patch a hole in drywall?
If you do a small one yourself, it costs about six dollars for a tube of spackle. For a professional patch, the price comes down to how big the hole is, whether the board has to be replaced, and how much texture matching the wall needs. A smooth-wall patch is quick. A knockdown ceiling patch takes longer and costs more. Send a photo and we will give you a straight number instead of a runaround.
Can I just use spackle to fill a large hole?
No, and it is the most common mistake we see. Spackle needs something to grab. Spread across an open gap it sags, cracks, and eventually falls right out. Anything past roughly half an inch needs backing behind it and a real patch or a fresh piece of drywall, not just a thick smear of filler.
Why does my drywall patch still show through the paint?
Usually one of two reasons. Either the mud was not feathered out wide enough, so there is a low spot or a ridge catching the light, or the patch was painted without matching the wall's texture and priming it first. Smooth mud in a textured wall always shows. Re-texture the patch to match, prime it, then paint, and it disappears.
How long does drywall mud take to dry before painting?
Regular joint compound takes about a day per coat, and a normal patch is three coats, so give it a few days start to finish. Setting-type compound, the powder numbered for its working time, hardens in minutes and lets you wrap up in an afternoon. Whichever you use, let it dry fully and prime it before any paint goes on.
What size hole needs drywall replaced instead of patched?
Roughly six inches is the line. Up to there, you can patch it. Past that, it is faster and stronger to cut the area into a clean rectangle and set in a new piece of drywall screwed to backing, then tape and mud the seams so it reads as one solid wall.